About LyncAutoAnswer
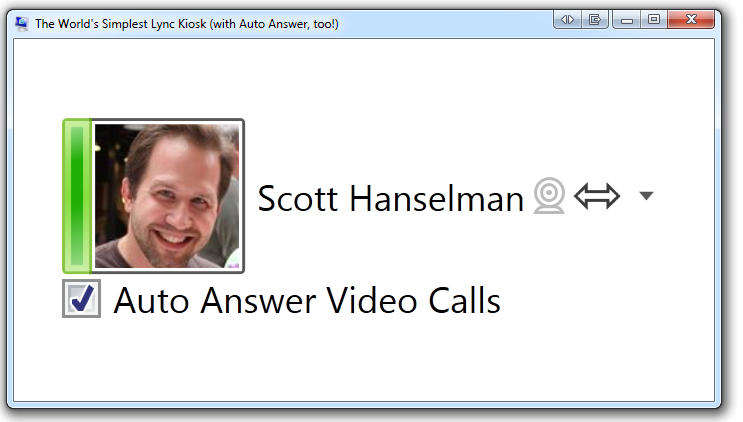
I have a machine at my remote office in Seattle that is dedicated to Lync Video. For whatever reason the Lync folks don't include basic checkbox options like "Auto Answer" and "Start Video Automatically when someone calls" and "Make Video Fullscreen". So, I did all that myself using the Lync SDK. Which is a nightmare. But it's done, so that's something.
- Kiosk application with auto-answer
- Auto-start video call
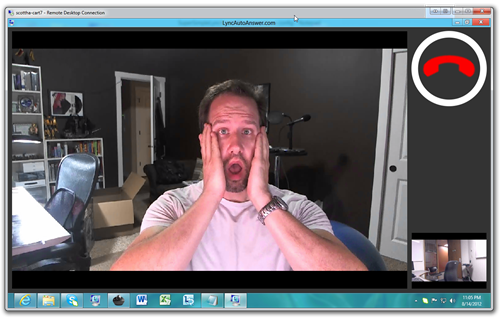
- Full-screen video
- Ideal for remote workers
I have dozens of articles on my blog dedicated to Remote Work setup that I hope you check out. I wrote about this LyncAutoAnswer project as well.
Feel free to have fun with the code, but we only guarantee that it "Works on My Machine.©™"

If you like it, give money to Diabetes Research.
Quick Setup Instructions
If you just want something that works and don't want to build it yourself, grab one of the binaries on the right. They're the Release builds of each of the different editions, built for AnyCPU. The readme in each file has specific instructions.
The general idea is simple. You create a Lync account that is NOT you; it's an account for your cart and the one you will call. Mine is called "Cart #7." I made a Domain Account that does NOT have the ability to login to a desktop. It doesn't have file system or network share access, it can only use Lync. Then I setup my remote machine to auto logon when it boots up. I also disabled it's power management and screensaver as this is a dumb kiosk.
Then you change the Lync Auto Answer settings like this:
<userSettings>
      <SuperSimpleLyncKiosk.Properties.Settings>
        <setting name="sipEmailAddress" serializeAs="String">
            <value>sip:scottha@you.com</value> <!-- THIS IS YOU -->
      </setting>
    <setting name="LyncAccountDomainUser" serializeAs="String">
         <value>DOMAIN\thecart7</value>
     </setting>
    <setting name="LyncAccountEmail" serializeAs="String">
          <value>thecart7@you.com</value>
      </setting>
     <setting name="LyncAccountPassword" serializeAs="String">
       <value><![CDATA[YOUR*CART*PASSWORDISHERE]]>
    </value>
     </setting>
    </SuperSimpleLyncKiosk.Properties.Settings></userSettings>
And that's it! The kiosk does the rest.
Which Edition?
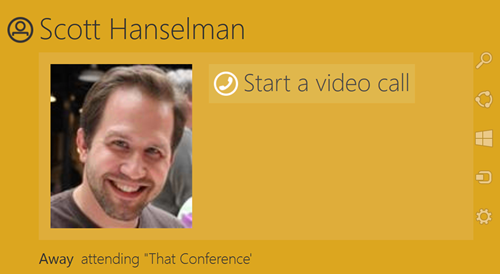
There's two editions of this project. The 'normal' way is to run code alongside the Lync Client - Non UI Suppressed. The other way is to run UI Suppressed. Both versions are below so you can see the differences: read about them and pick your favorite to play with.
Not UI Suppressed Edition
This got written and blogged about first. It doesn't require you to do anything special other than have Microsoft Lync 2010 running. It will auto-answer calls, connect video and go full screen.
A special nod to the InputSimulator project on CodePlex, as I'm using his excellent library.
To build or change this project, open the proj file in the Not UI Suppressed folder.
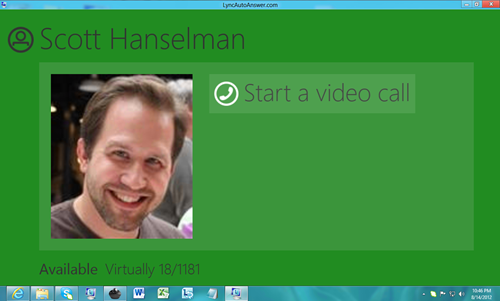
UI Suppressed Edition
After writing the Not UI Suppressed edition, I reached out to Tom for help with making a UI Suppressed version so I could do true full-screen and have more control, as it's complicated to use Lync in UI Suppression Mode. The guys at Modality Systems wrote me a wrapper class (also a GitHub project) which takes a lot of that pain away, and refactored my code to make a UI Suppressed edition.
You can see, build or change the UI Suppressed version by opening the proj file in the UI Suppressed folder.
UI Suppression Mode
UI Suppression Mode is a special setting in Lync which hides the client whilst still allowing the SDK to run and communicate with the underlying process. It's a more powerful method of using the SDK, but means you have to do all the work (such as signing in, getting presence etc.)
To use UI Suppression Mode you need to make a registry change to tell Lync you want to use it. Close Lync (not just sign out) and then run the right script for your environment:
- 32bit machines: Suppression ON | Suppression OFF
- 64bit machines: Suppression ON | Suppression OFF
You can also find these scripts in the Download section
More Information / Resources
- Both projects use the Lync 2010 Client Developer SDK
- The UI Suppression edition uses the Lync-UISuppression-VideoAutoAnswer project.
- Scott's blog post about writing the Not UI Suppressed edition as well as this new UI Suppressed Edition.
- Tom's blog post about writing the UI Suppressed edition
- MSDN article on UI Suppression